


![]()
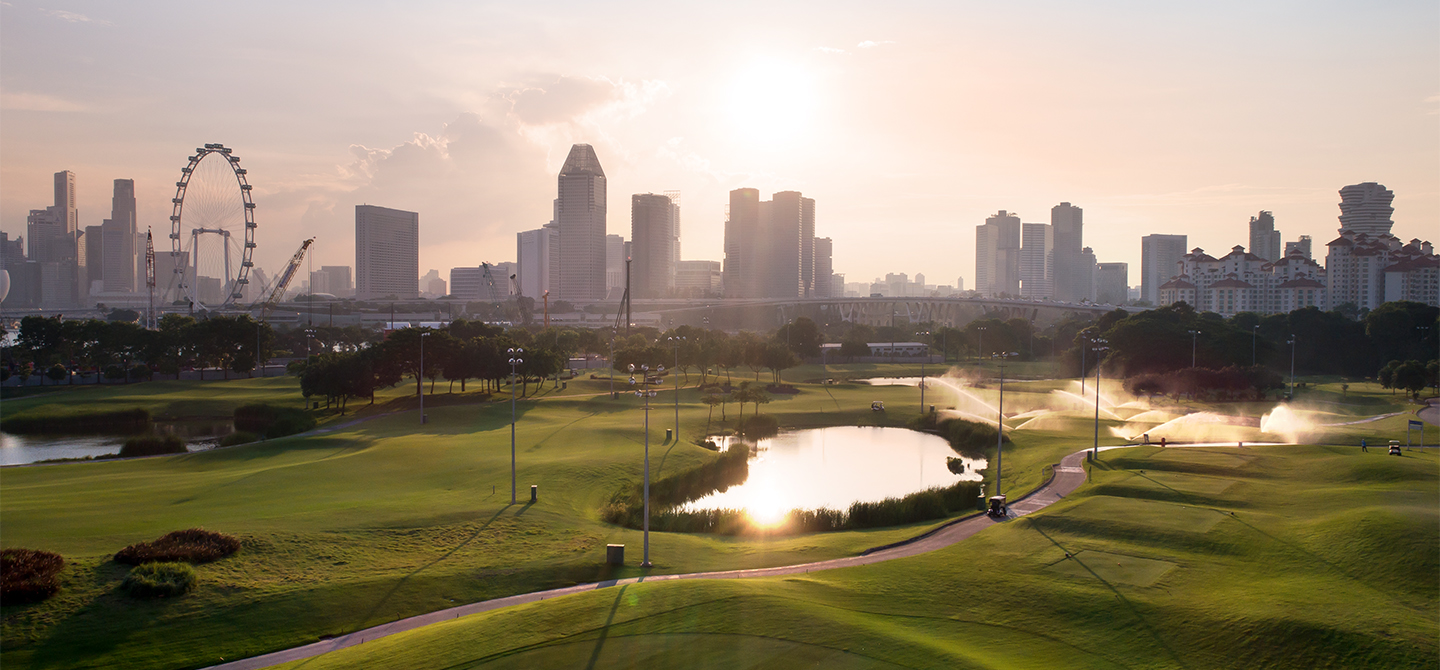
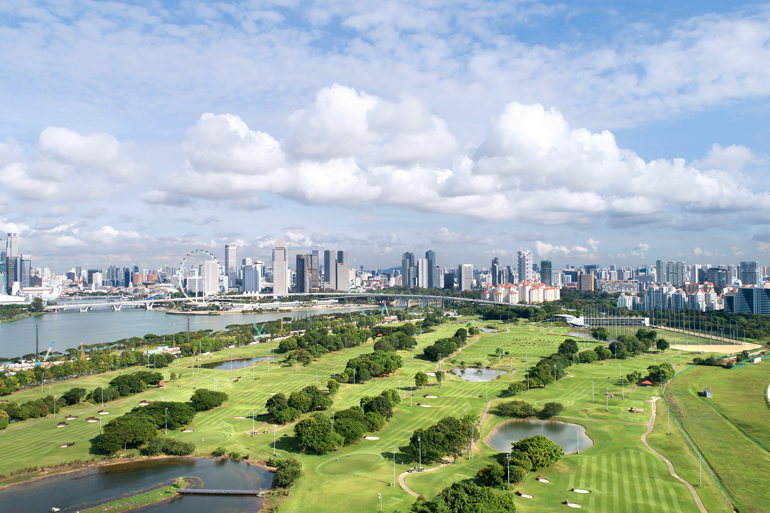
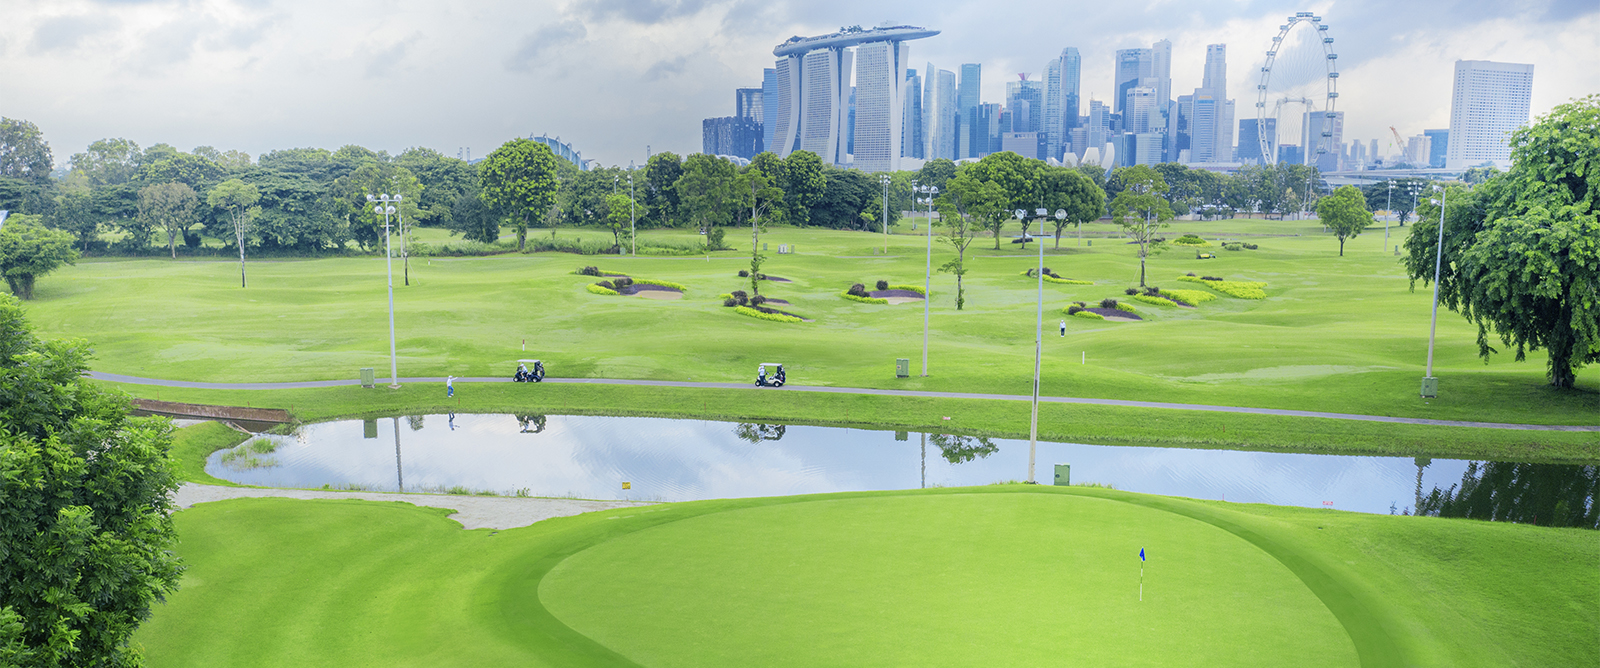
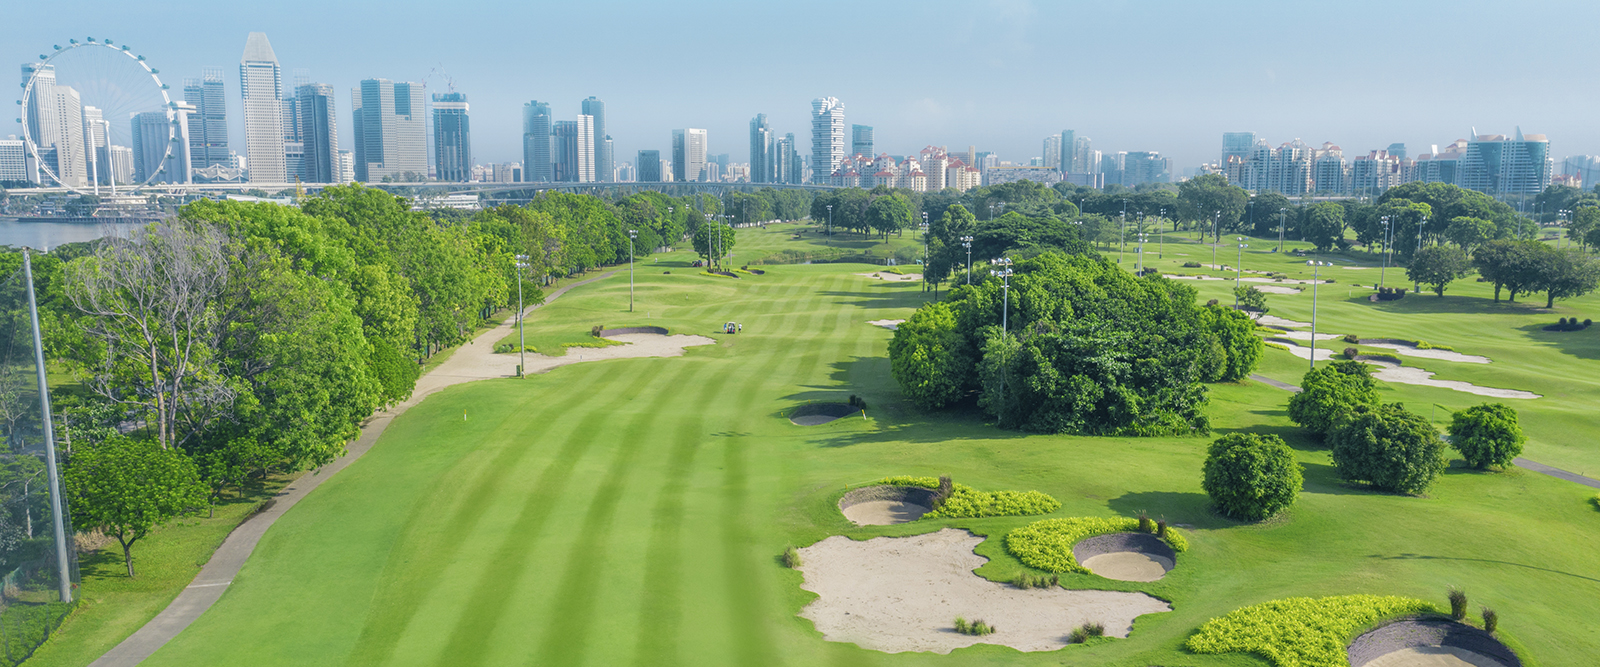
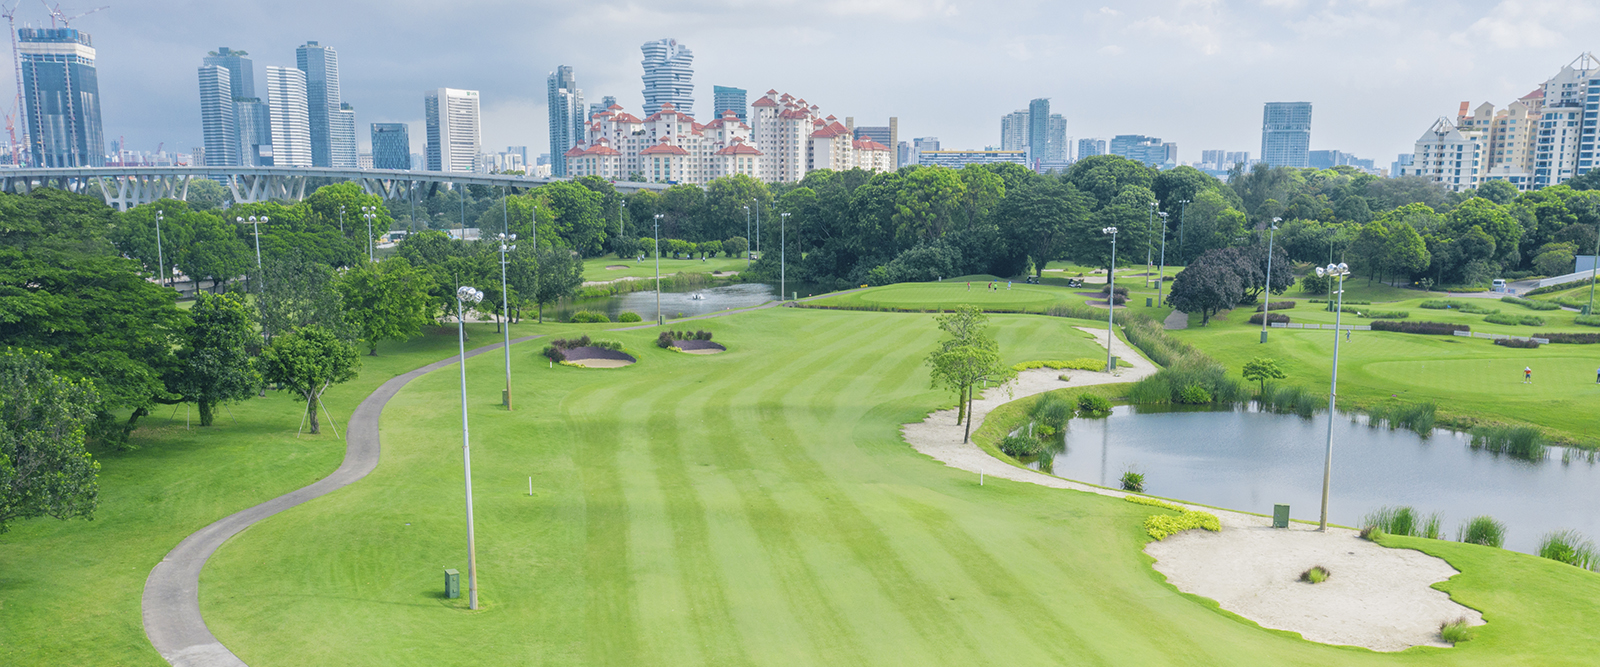
Designed by South African Phil Jacobs and open for play in 2006, Marina Bay Golf Course is Singapore’s only 18-hole public golf course and one of Asia's best public golf courses.
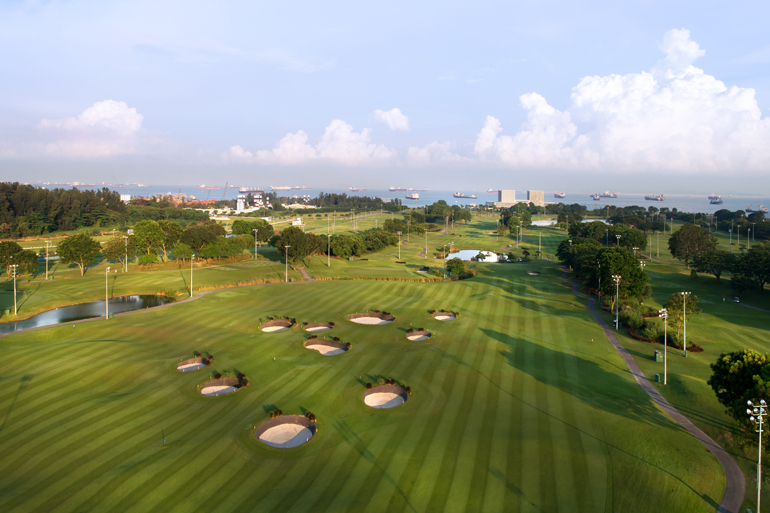
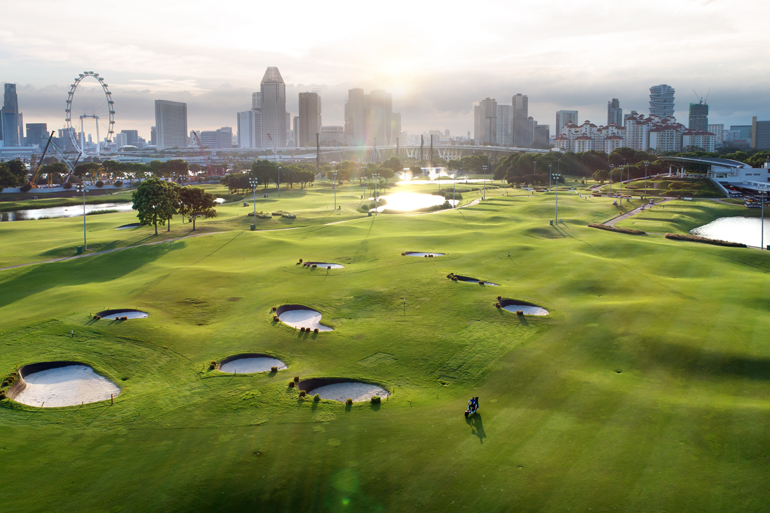
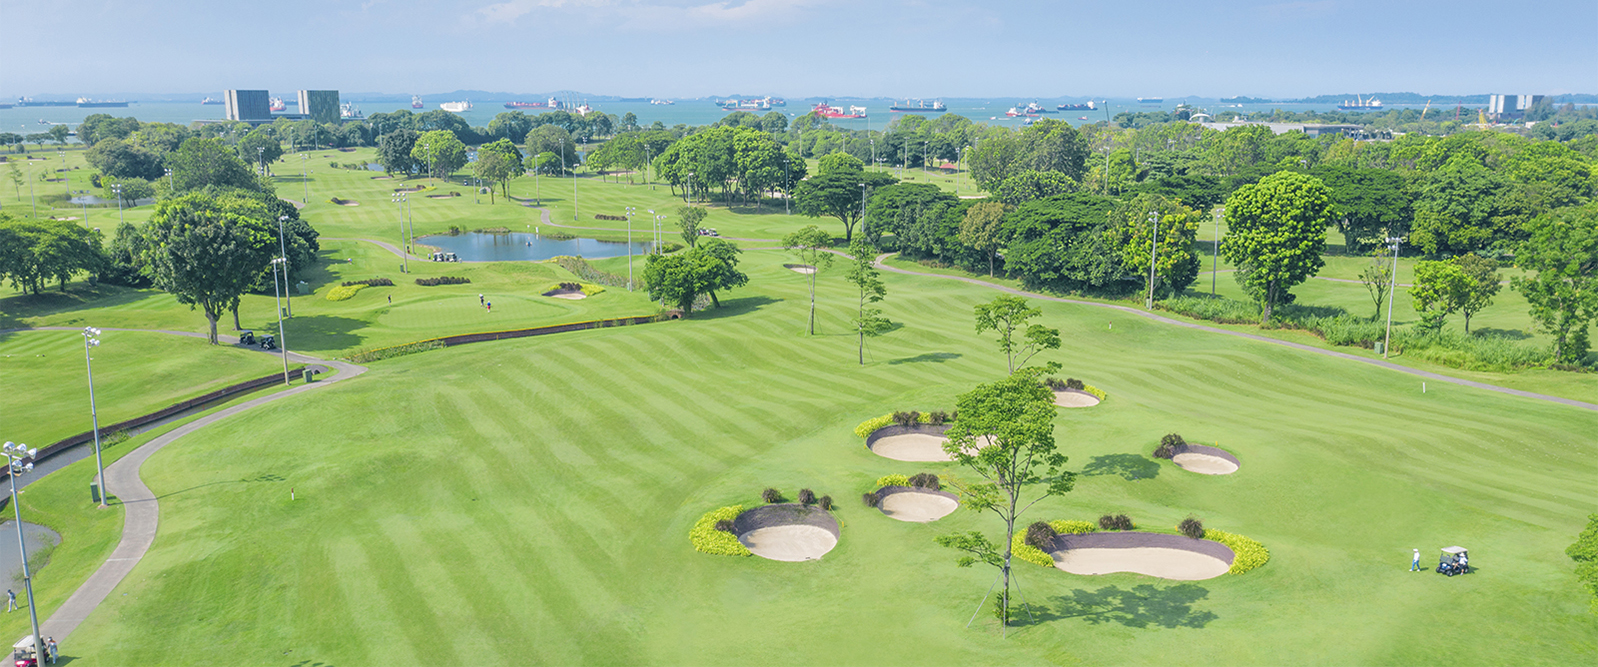
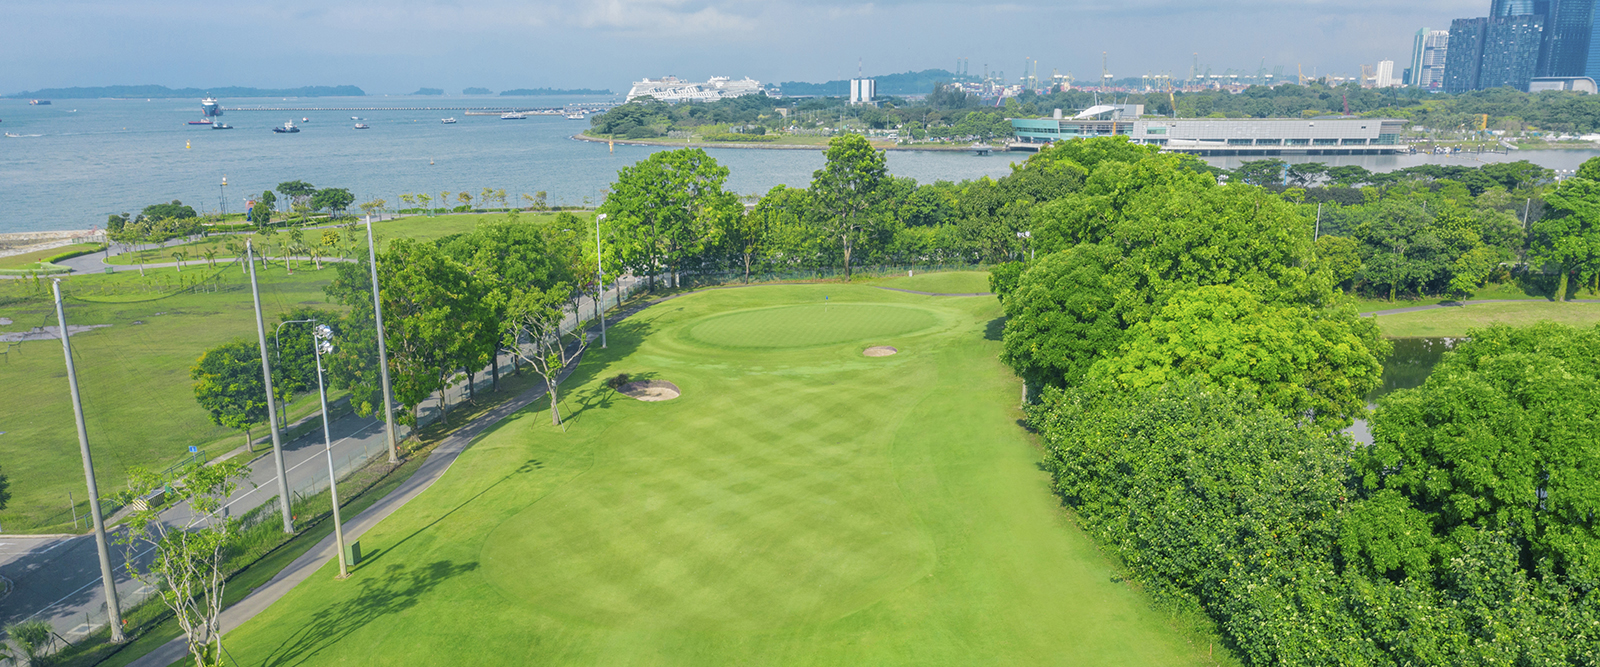
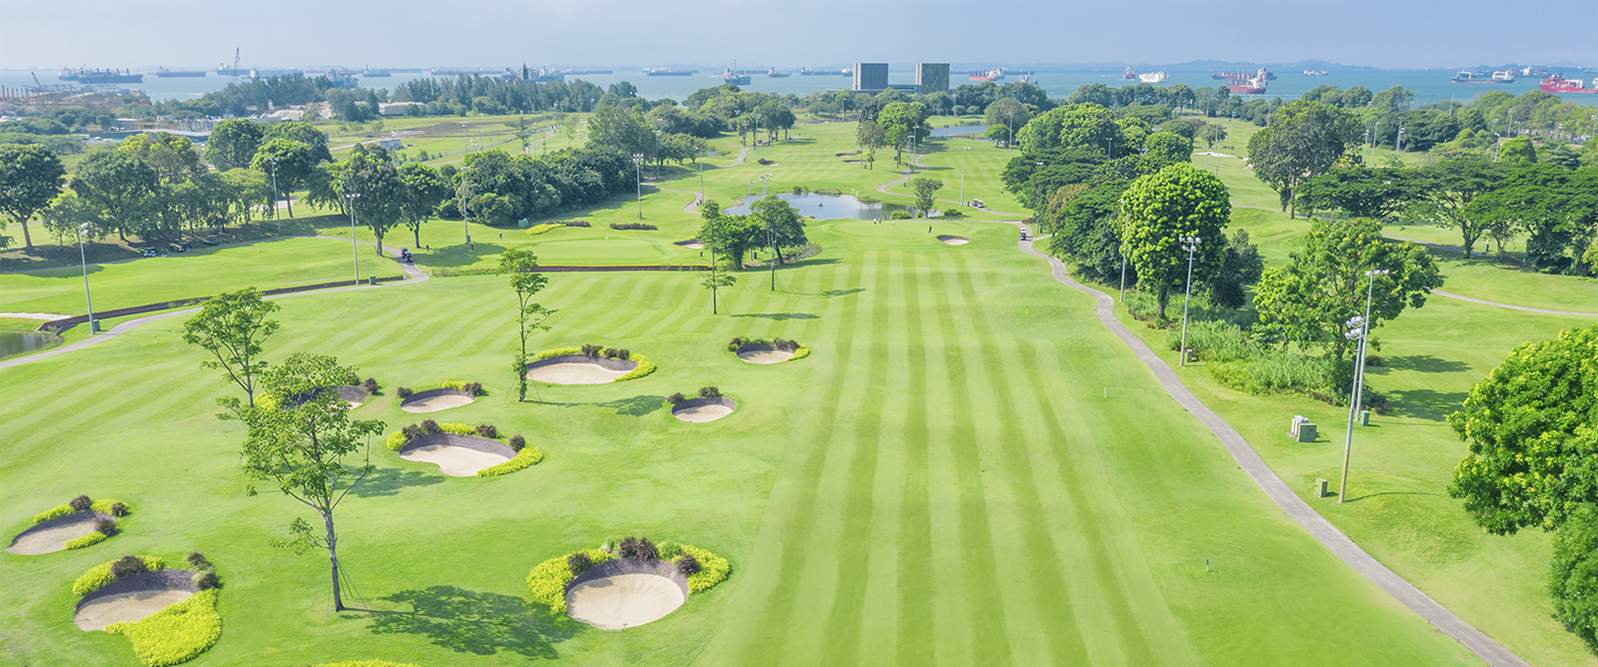
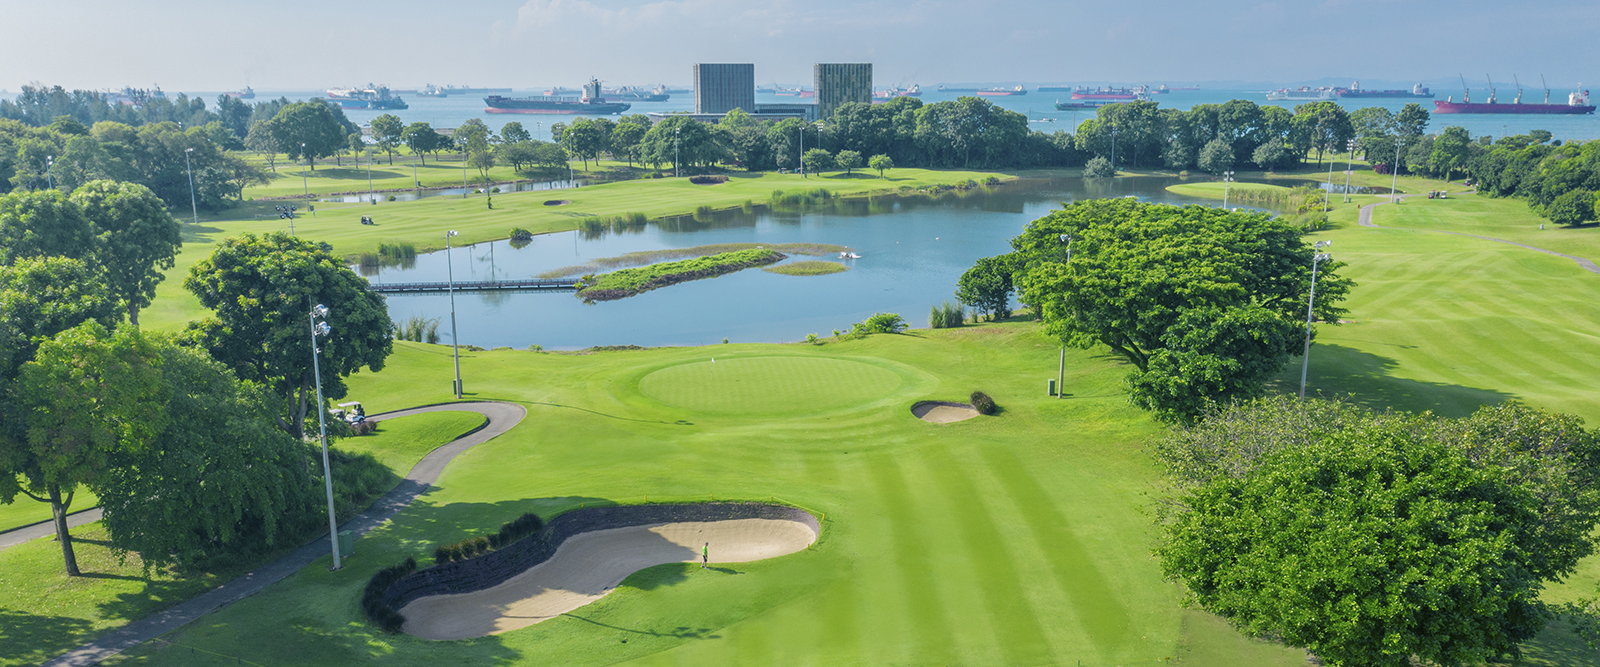
The 6493m, par 72 course is one of the few outstanding links-styled golf courses that you can find in Asia. Featuring 66 dramatic yet treacherous pot bunkers of varying sizes and depth, tremendous variety in the length of the holes and many undulations, the award-winning course provides many hours of challenges and enjoyment to golfers. Signature holes of the quality course include the 651-meter par-6 hole and the par-3 hole with island green design. Another recently added design feature is the waste bunker which offers a novel golf experience for regular players.
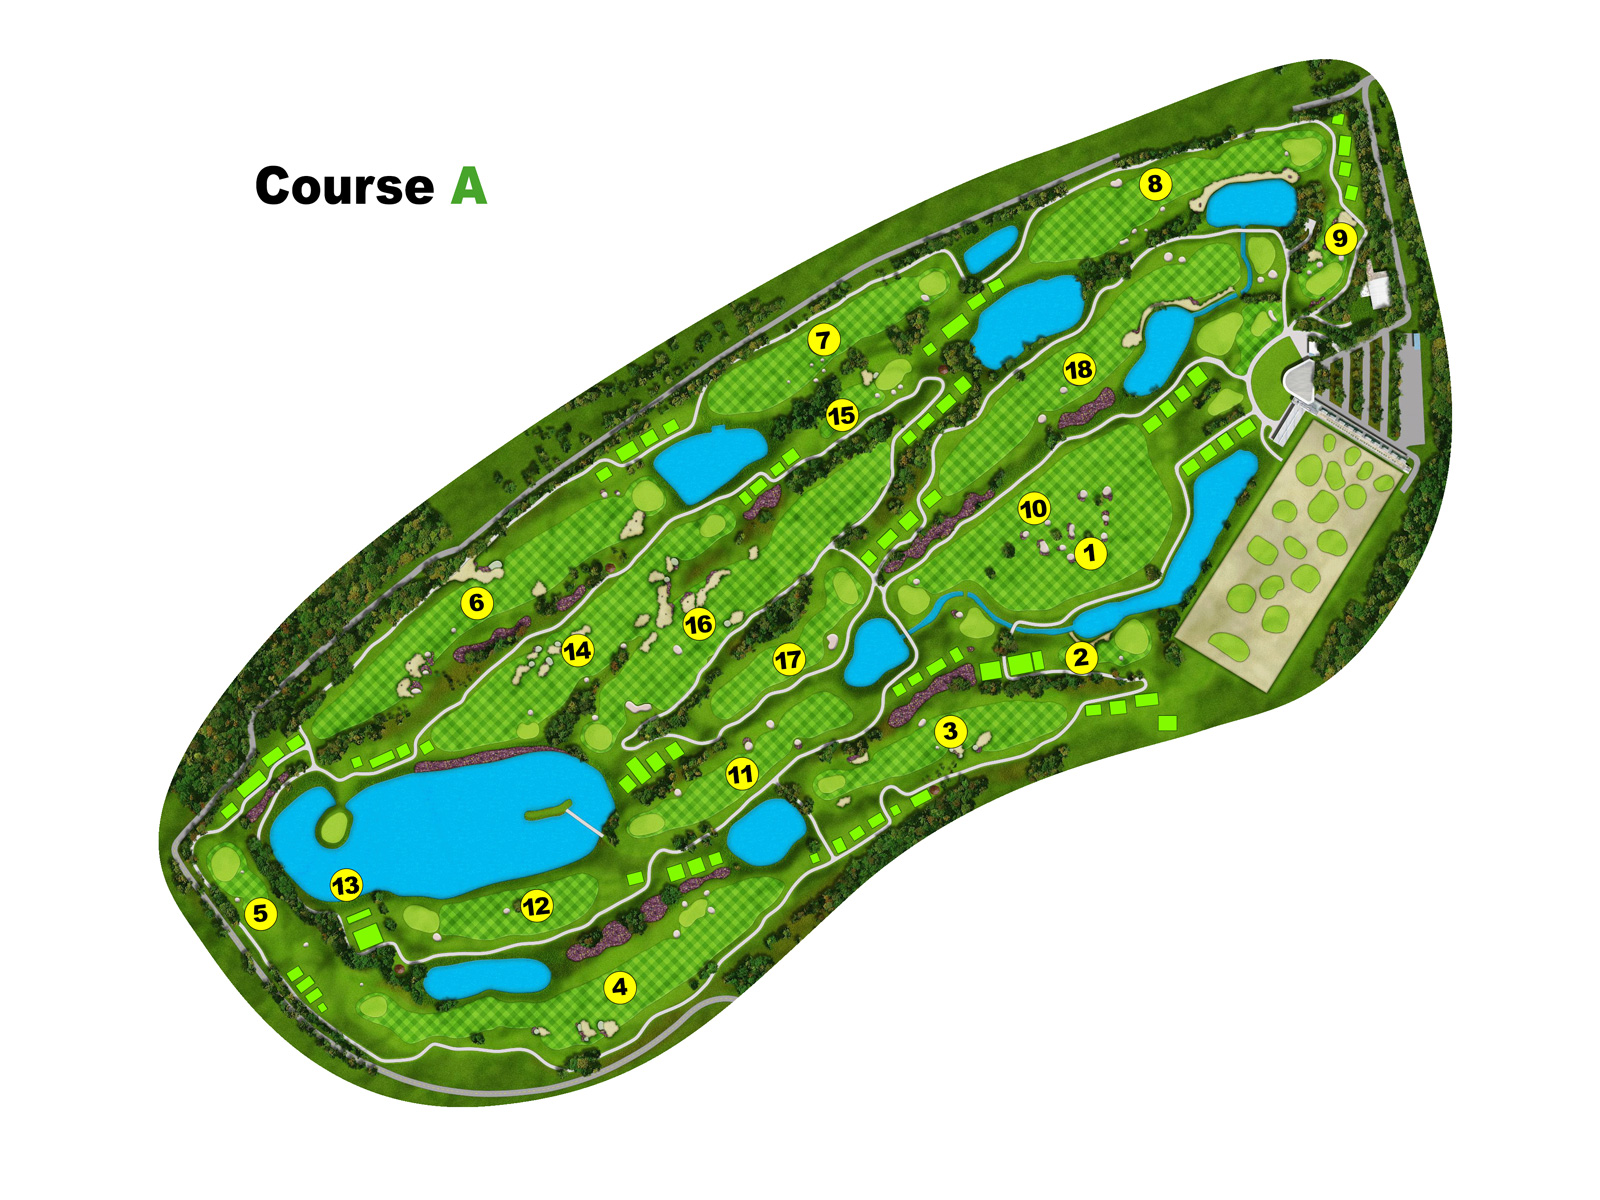
In May 2019, Marina Bay Golf Course introduced a new course configuration to allow golfers to derive a new experience out of playing 18 holes. Course A comprises of an outer and inner loop of two nines, while the new configuration, Course B features some holes crossing over to the inner loop after hole 5.
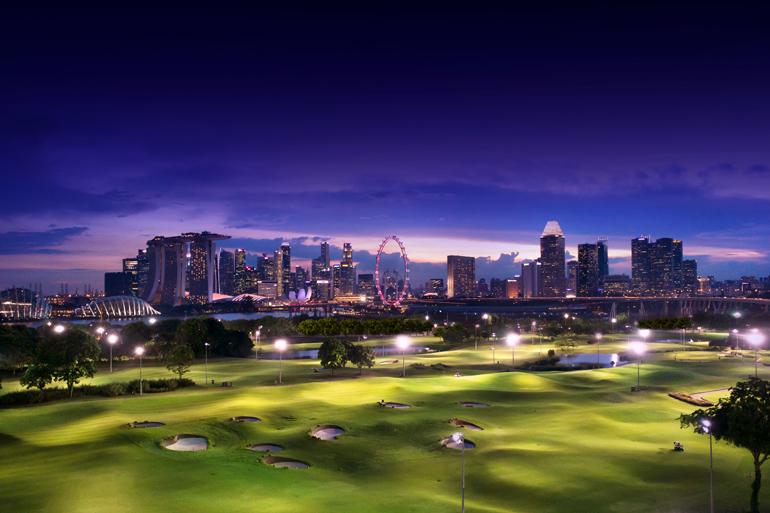
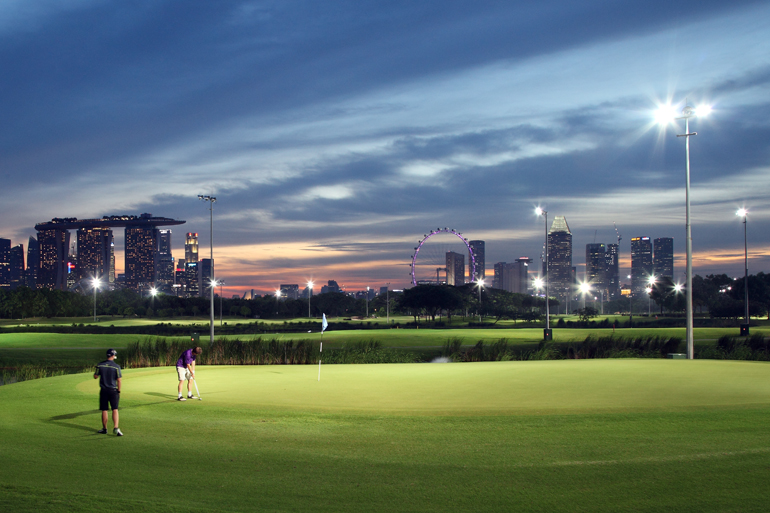
Besides being one of the few golf courses in Singapore to offer night golfing, Marina Bay Golf Course also houses one of the biggest driving ranges in the region.
Click here to view video on Marina Bay Golf Course.

View Gallery

Book.
Advertisement

Course Layout
Course Rating
Course Details
On the opening tee shot, the golfer will feel dwarfed by the expansive landscape, as this fairway is shared with the adjacent fairway. These two fairways are separated by a series of menacing looking bunkers, with the approach shot over a burn (stream) that meanders right in front of the green, very much like the 1st hole at St Andrews.

| Black | 349m |
| Blue | 324m |
| White | 303m |
| Red | 279m |
This hole plays relatively easy due to the short and large green. However, tight pin positions can be found along the left side of the green.
| Black | 149m |
| Blue | 149m |
| White | 117m |
| Red | 99m |

This hole will often play into the wind and under those conditions; it will be a long Par 4 for most golfers. Fairway bunkering to the left forces the hole into a slight dogleg, while the fairway bunker on the right will challenge the long hitters. The green is slightly raised and relatively narrow with a drop off area on both sides of the green. Only the most accurate approach shot will find this green. However recovery from both left and right side of the green is possible by way of a lob, chip shot or even a putt.
| Black | 395m |
| Blue | 369m |
| White | 339m |
| Red | 282m |

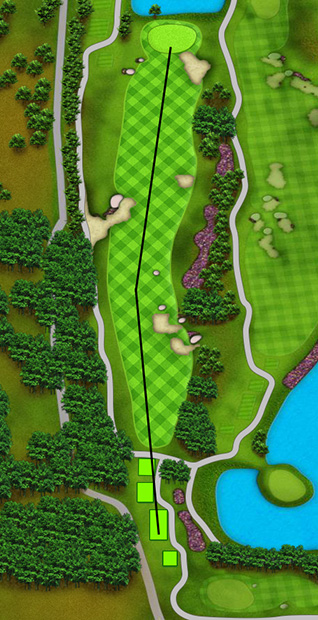
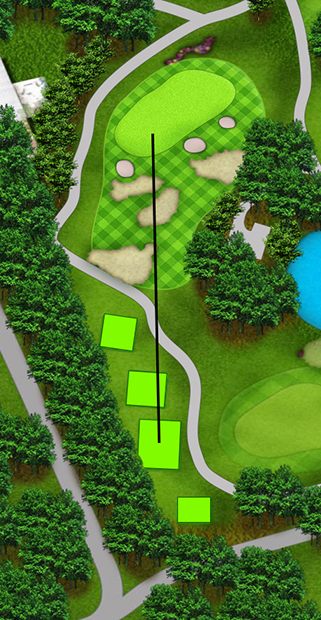
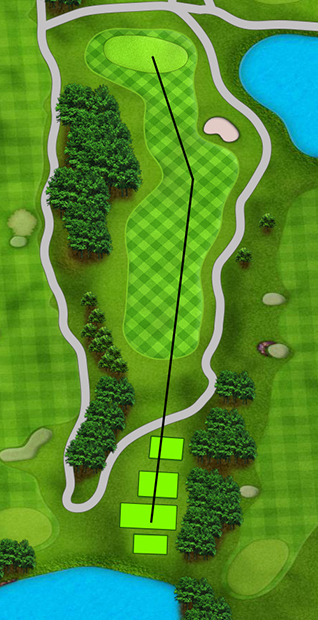
As the longest and only par 6 hole in Singapore, this hole is sure to test even the best golfers. The tee shot is guarded by a group of bunkers on the right side of a generous landing area. The second shot has bunkering to the left while the water will come into play on the right side for long hitters as the fairway narrows. The view of the green is obscured from this location by a group of trees as the fairway doglegs to the right to an undulating green.

| Black | 651m |
| Blue | 617m |
| White | 593m |
| Red | 569m |
A bunker left of the green will test the golfer's depth perception because it will appear as though it is close to the green.

| Black | 181m |
| Blue | 163m |
| White | 149m |
| Red | 136m |
Even though this hole is relatively long according to the score card, it will often play on the short side for the long hitter because of a helping wind. However, the long hitter will have to negotiate a series of bunkers on the right side of the fairway as well as two bunkers left short of the green, if he wants to reach this green successfully in two shots. At the green, the landscape opens up again and he will have a view of the rest of the golf course.
| Black | 543m |
| Blue | 508m |
| White | 473m |
| Red | 447m |

At this hole, there are five small bunkers on the right of the fairway, thus creating a dramatic look. If the golfer plays to the right, he will find that he will not be able to see the green because he will be blocked by bunkers. On this hole, accurate driving will be rewarded.

| Black | 396m |
| Blue | 362m |
| White | 335m |
| Red | 310m |

This will likely be one of the most testing holes and only two long and accurate shots will reach the green in regulation play. A series of bunkers along the right hand side will come into play on the tee shot and sometimes even on the second shot for the careless golfer. A small bunker in the middle of the fairway short of the green will test the golfers’ depth perception. The green is also angled slightly across the line of play, highlighting the importance of club selection.
| Black | 452m |
| Blue | 416m |
| White | 384m |
| Red | 357m |
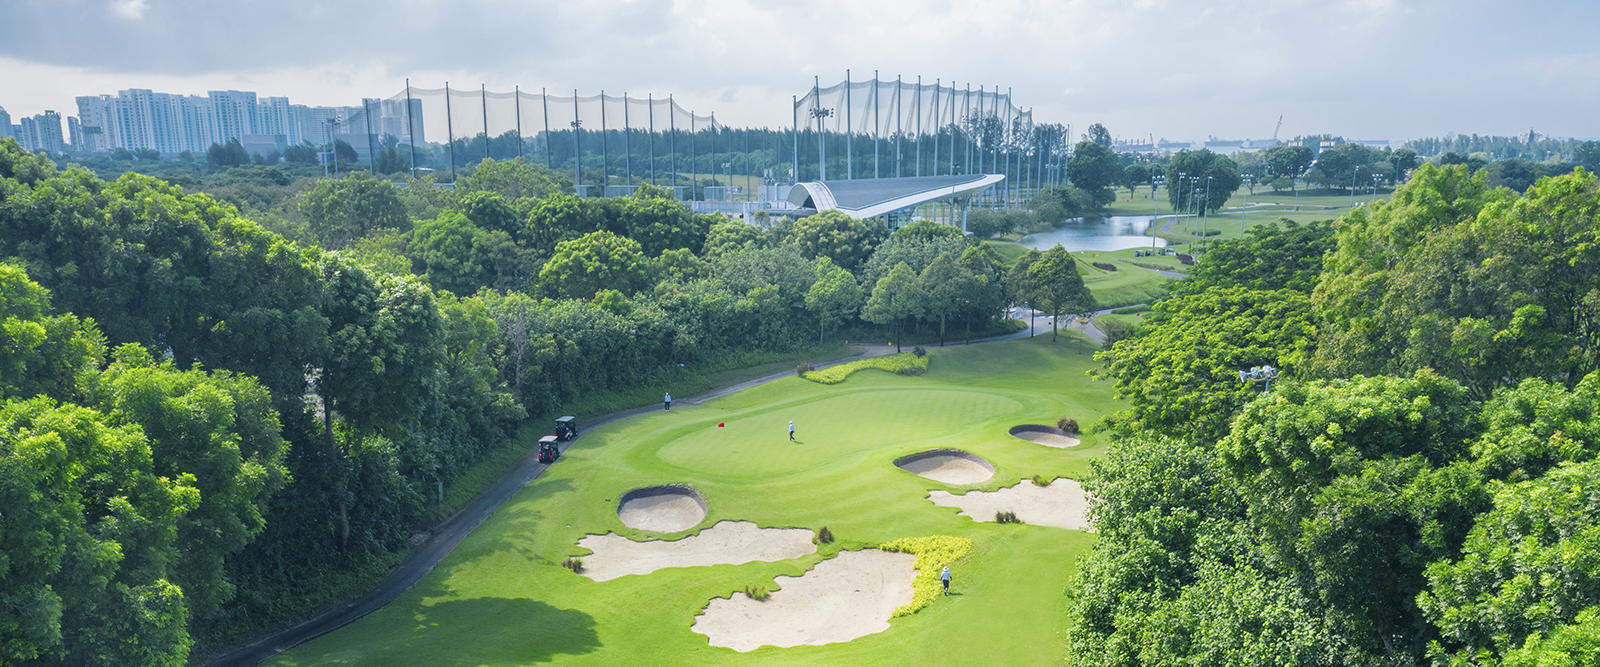
This hole features a very wide green with three bunkers fronting it, while the interesting Clubhouse structure provides the backdrop to the green. The area to the left of the tees is raised and densely vegetated, hence blocking the golfer off completely from the outside.
| Black | 161m |
| Blue | 133m |
| White | 111m |
| Red | 86m |
After a good tee shot, the golfer will be confronted with an approach shot to the green that sits on the right of a burn. Any shot slightly to the left will end up in the burn. Given that this hole generally plays into a slightly cross wind, it will prove to be one of the more testing holes on the golf course.

| Black | 417m |
| Blue | 375m |
| White | 354m |
| Red | 311m |
Even though this is one of the shorter Par 4’s, a series of fairway bunkers will test the golfing skills of golfers from all levels. The most dramatic feature of this hole is that when the golfer gets on the green, the landscape will open up and he will have a beautiful view of the large lake behind the green. The tees on this hole are also elevated above existing ground level.

| Black | 365m |
| Blue | 340m |
| White | 316m |
| Red | 296m |
During down wind conditions, the long hitter will have a chance to either drive the green or finish just short of the green. The ground is shaped left short of the green, such that the ball to funnel into the green. Two small fairway bunkers in the middle of the fairway will also test the shorter hitter and the player who plays conservatively from the tee. The green is angled across the line of play and if you are to play a lay-up shot, it is best to approach the green from the left side of the fairway.
| Black | 313m |
| Blue | 292m |
| White | 269m |
| Red | 229m |
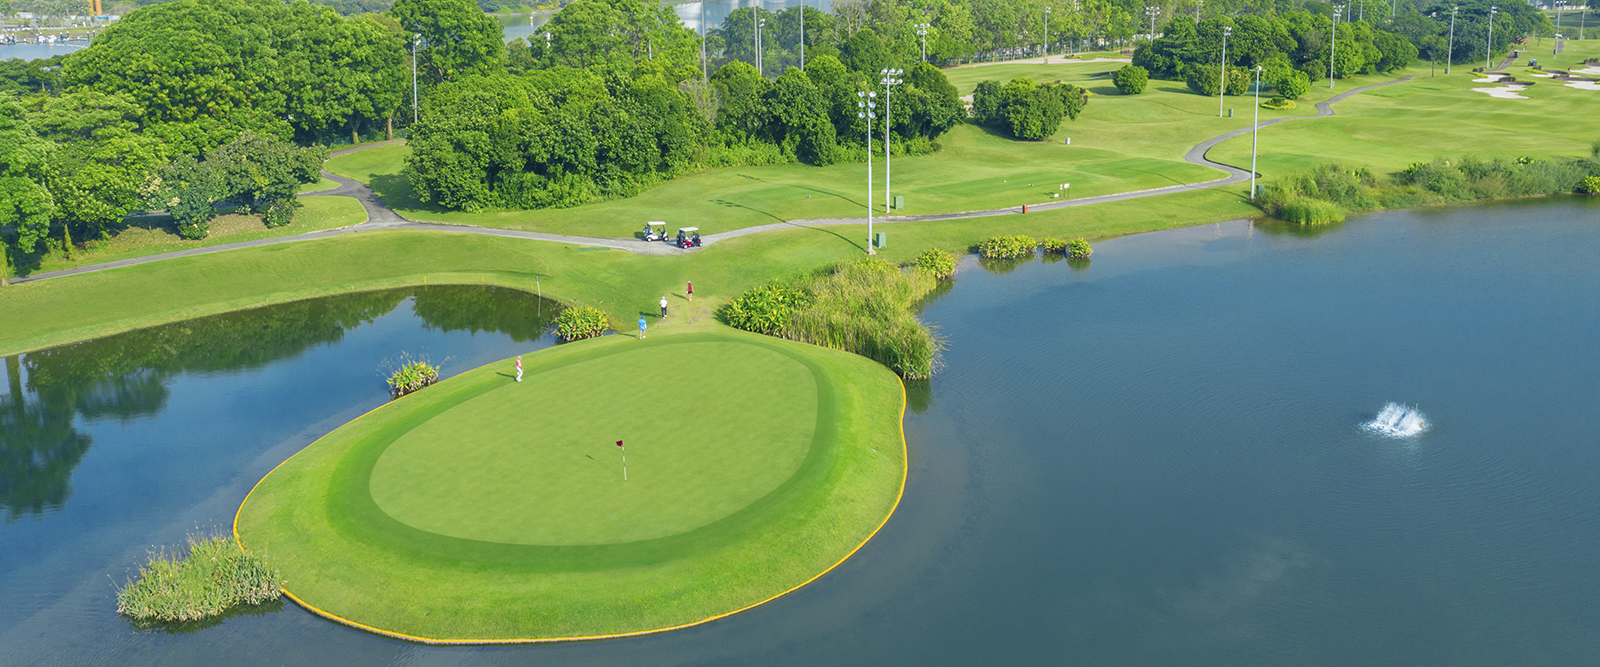
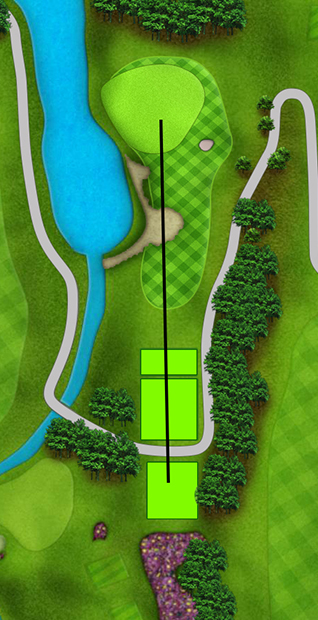
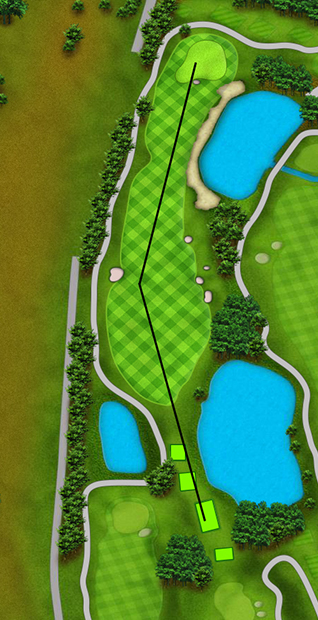
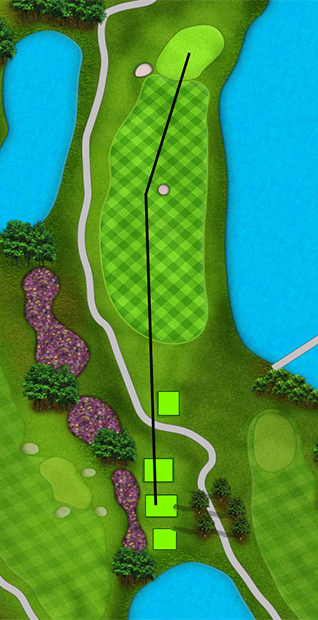
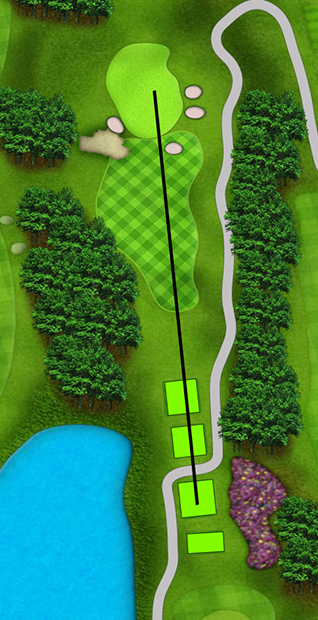
This short Par 3 features an island type green. The green is surrounded with a railway tie type retaining wall. The tees are slightly higher than the green such that the golfer will have a beautiful view of the putting surface. As this hole plays across the prevailing wind direction, the golfer will be able to shape his shot into the wind to hold the ball up, if he wishes to do so.

| Black | 119m |
| Blue | 119m |
| White | 119m |
| Red | 95m |

Though the fairway is wide, a series of bunkers left of the fairway turns the hole into a slight dogleg to the left. The best position from the tee is towards the right side of the fairway, where the golfer will have a better view towards the green. Two bunkers come into play short of the green and will test the strategies of golfers who are unable to reach the green in regulation play. The relatively small green features a drop off area on both sides. Par on this hole will feel like a birdie.
| Black | 452m |
| Blue | 426m |
| White | 402m |
| Red | 379m |
As the longest Par 3 on the course, this is a very demanding hole and the golfer will have to try to stay out of the four bunkers that come into play around the green. The front of the green is open however, and a low running type shot can reach the putting surface. High mountings left and right will give the golfer a sense of playing up a valley.
| Black | 194m |
| Blue | 177m |
| White | 149m |
| Red | 131m |
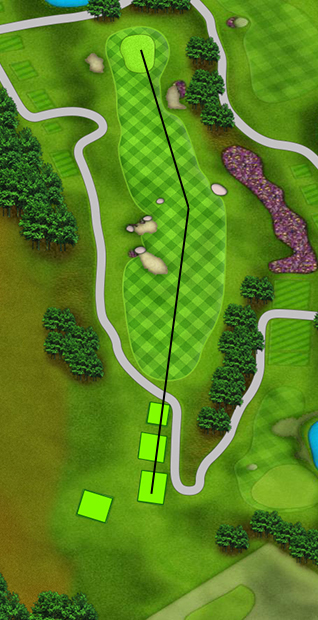
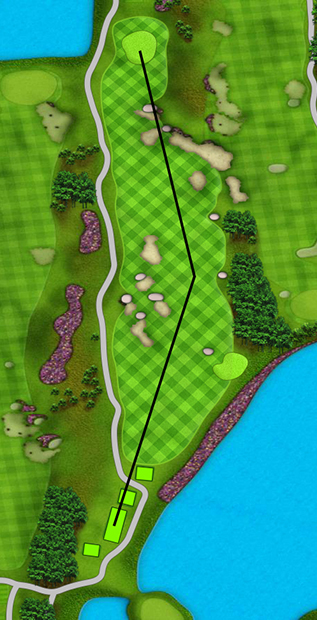
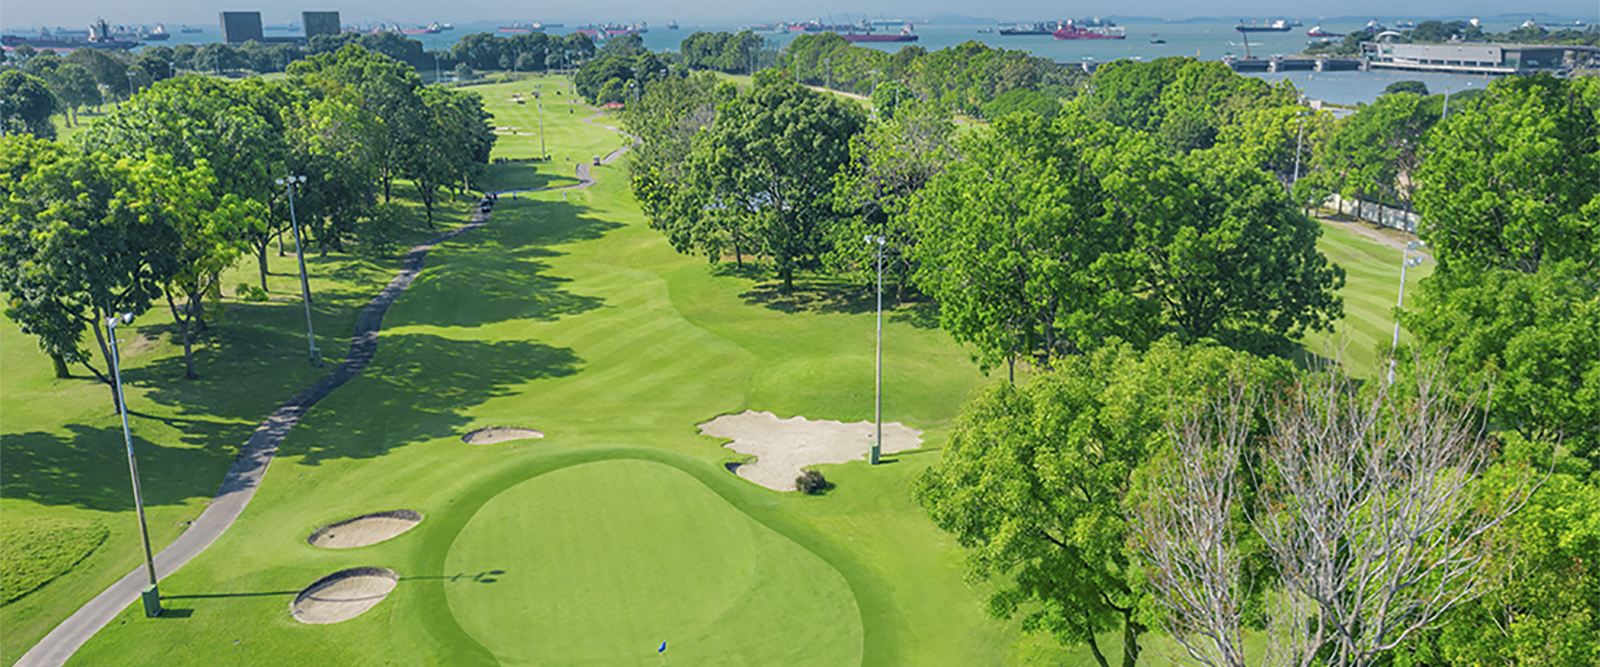
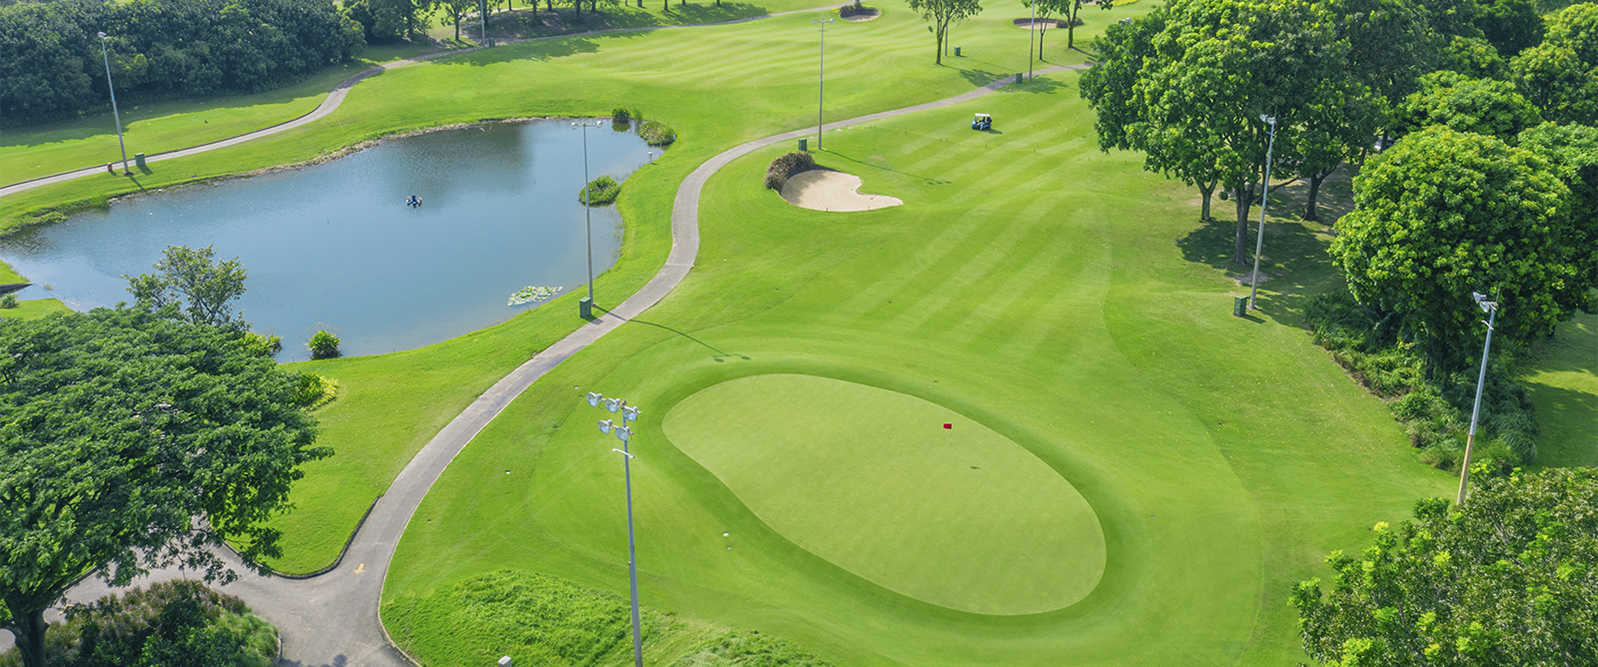
On this hole, the golfer is shown a wide fairway. A series of fairway bunkers come into play, most notably a large ‘hell’ bunker that protects almost the entire fairway short of the green. All golfers will have to try and negotiate this bunker. Once the golfer reaches the green, he will have a beautiful view from the back of the green over the large lake area. The tees on this hole are also substantially raised.
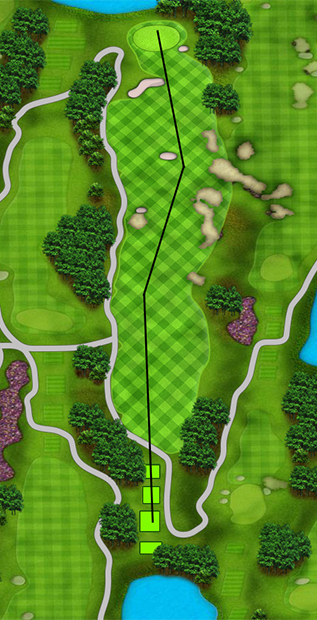
| Black | 527m |
| Blue | 499m |
| White | 472m |
| Red | 448m |
The main feature here is the high mounding which is planted with trees, and protects the left side of the fairway, turning this short Par 4 into a slight dogleg left. A large bunker along the centre line of the fairway will come into play for the long hitter, who hits his ball slightly to the right, providing a chance to reach or get very close to the putting surface on the tee shot. However, because of the challenges around the relatively small green, any careless play will usually result in a bogey.
| Black | 307m |
| Blue | 289m |
| White | 269m |
| Red | 246m |
The golfer is given a very wide fairway to aim at. However, good golfers will be challenged by the fairway bunkers from the back tees. A water hazard and two bunkers will also come into play for the second shot, while the green is fronted by a burn (stream). The home green is a large green with interesting movement.

| Black | 522m |
| Blue | 494m |
| White | 465m |
| Red | 433m |


